Kub Kar Timer
Table of Contents
My boys are in Boy Scouts and the annual Kub Kar races are a fun part of the program. Our group has a couple older wooden tracks and I wanted to add a timer mechanism to them that would time and rank each car for each race.
I decided to build this based on the Arduino platform because I’m at least somewhat familiar with it.
Update 2016-02-21 - We had our first rally using this contraption and it worked flawlessly. The kids loved it.

There are companies that sell timers but at $615 for a 4 track timer… Ouch!
The Setup #

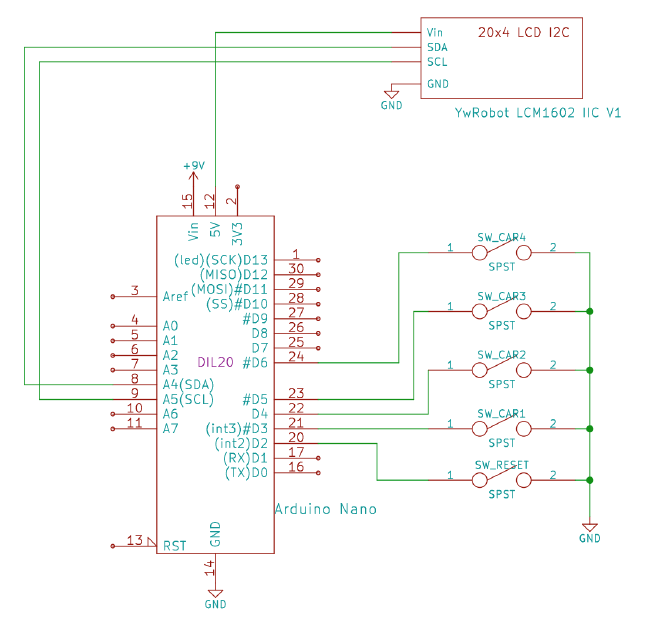
All the input PINs (D 2,3,4,5,6) should have their internal pull-up enabled.
The Trigger #
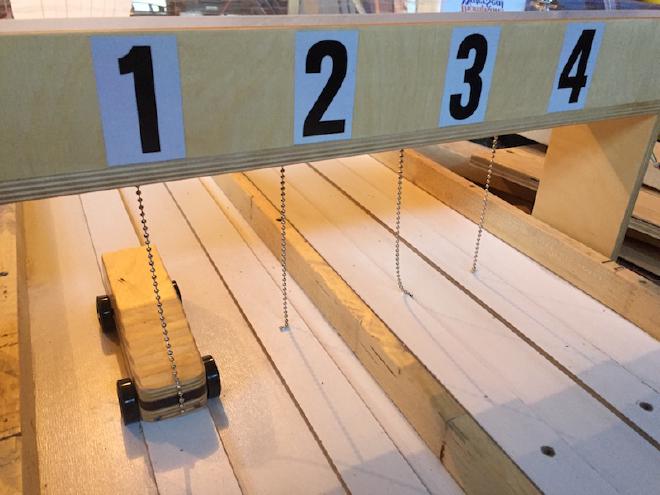
The complicated part of this project is detecting cars as they pass through finish gate. Typically this would be done optically with the car breaking a beam and that stopping the clock. However, I finally started this project three days before the race. I didn’t have any lasers or photo-sensors handy so I took an alternative and mechanical approach.

I considered adding push buttons at the very end of the track but, given the speed some of the cars are going, I figured I’d either damage the buttons or the cars with that approach.
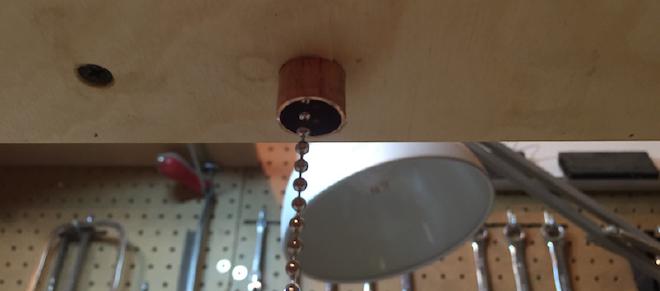
The premise for my final solution was to dangle a conductive “wire” (lamp pull chain) across the track and the car will push it into another conductor (surrounding copper tube) closing a circuit. Because the switch isn’t in charge of stopping the car I figured this would hold up to the abuse better.

I ended up drilling a 1/2" hole in the underside of the timing platform and insert a 1" section of 1/2" copper pipe. Directly through the center I dangled a chunk of steel lamp pull-chain. The copper tubes are all tied to ground and the chains are tied to the Arduino’s digital IO pins (with internal pull-up resistors enabled).
For actually triggering the race I ran cables from the timer to the starting gate and then used some Allround as an improvised switch that was closed when the gate was up. As soon as the gate drops the timer starts.
The Display #
If I were good at this type of thing I think the right displays would have been 4 big 7-segment displays for the placing, and then 4 multi-digit displays for the times. Using big 7-segment displays would be nice because you can read them from far away.
I opted for a small 20x4 LCD I2C display because that’s what I had handy.
The Software #
The source code for this entire project is here.
The Build #
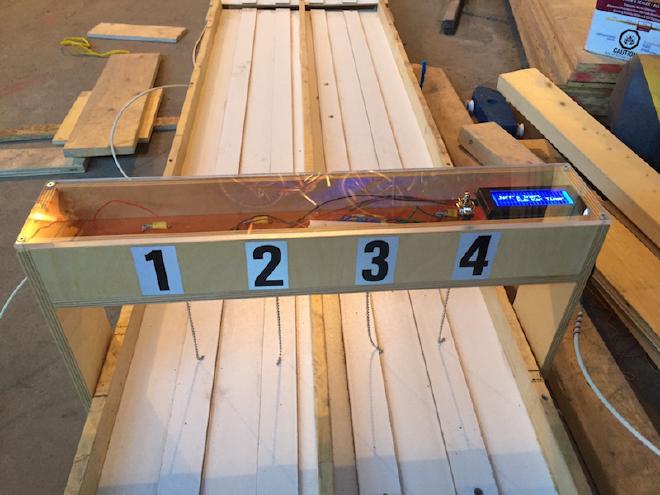
I built the track from 1/2" Baltic birch plywood.
The only real concerns are making sure it’s wide enough to straddle the track and high-enough to allow verticals to pass underneath without incident.
The top is covered with a piece of 1/4" Lexan to allow everyone to see the interesting bits inside.